Getting Started
The Getting Started topic introduces you to the basics of SkyBackup. It guides you through creating your first account, performing your initial backup, and restoring your data.
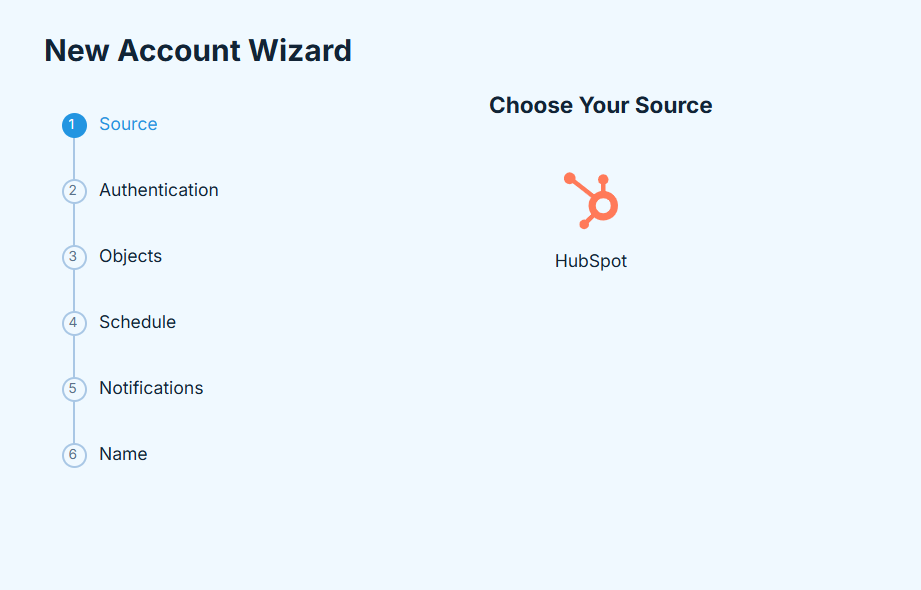
Creating Your First Account
After logging in to SkyBackup for the first time, create your account. Account is your working place. You need to create at least one account to start backing up your data. You can create multiple accounts if needed. Account holds your backup settings and the history of all your backups. While creating your account you set up the connection to Data Source, backup settings, and more.
To create your first account:
-
Click + Add Account.
-
Choose the available cloud data source.
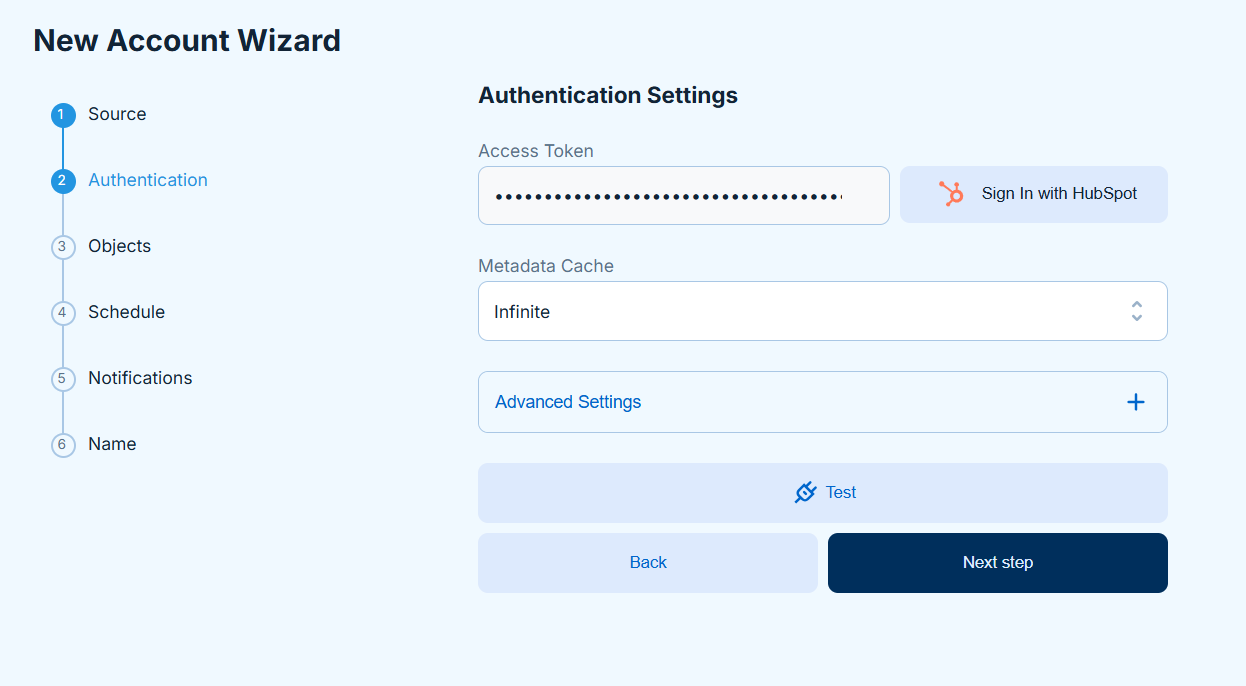
-
Establish a connection to your data source by providing your credentials.
-
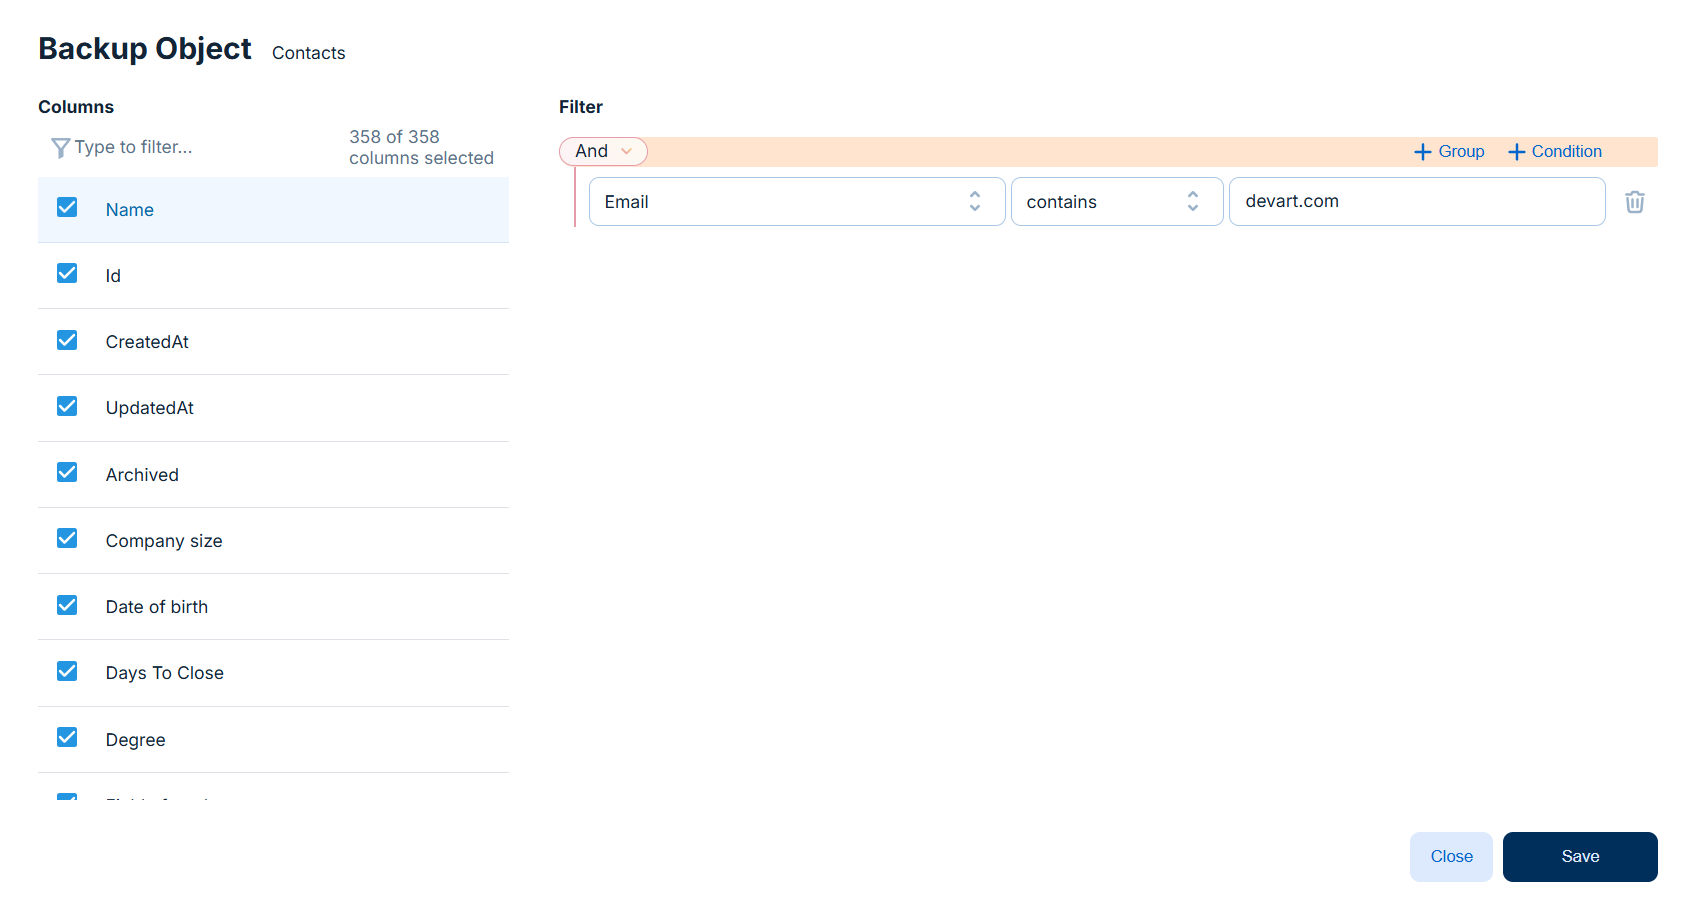
Choose the objects to back up. You can select all objects or specific ones only.

-
Click Edit icon next to the object’s name to select specific fields to backup. You can additionally apply record filters here.
-
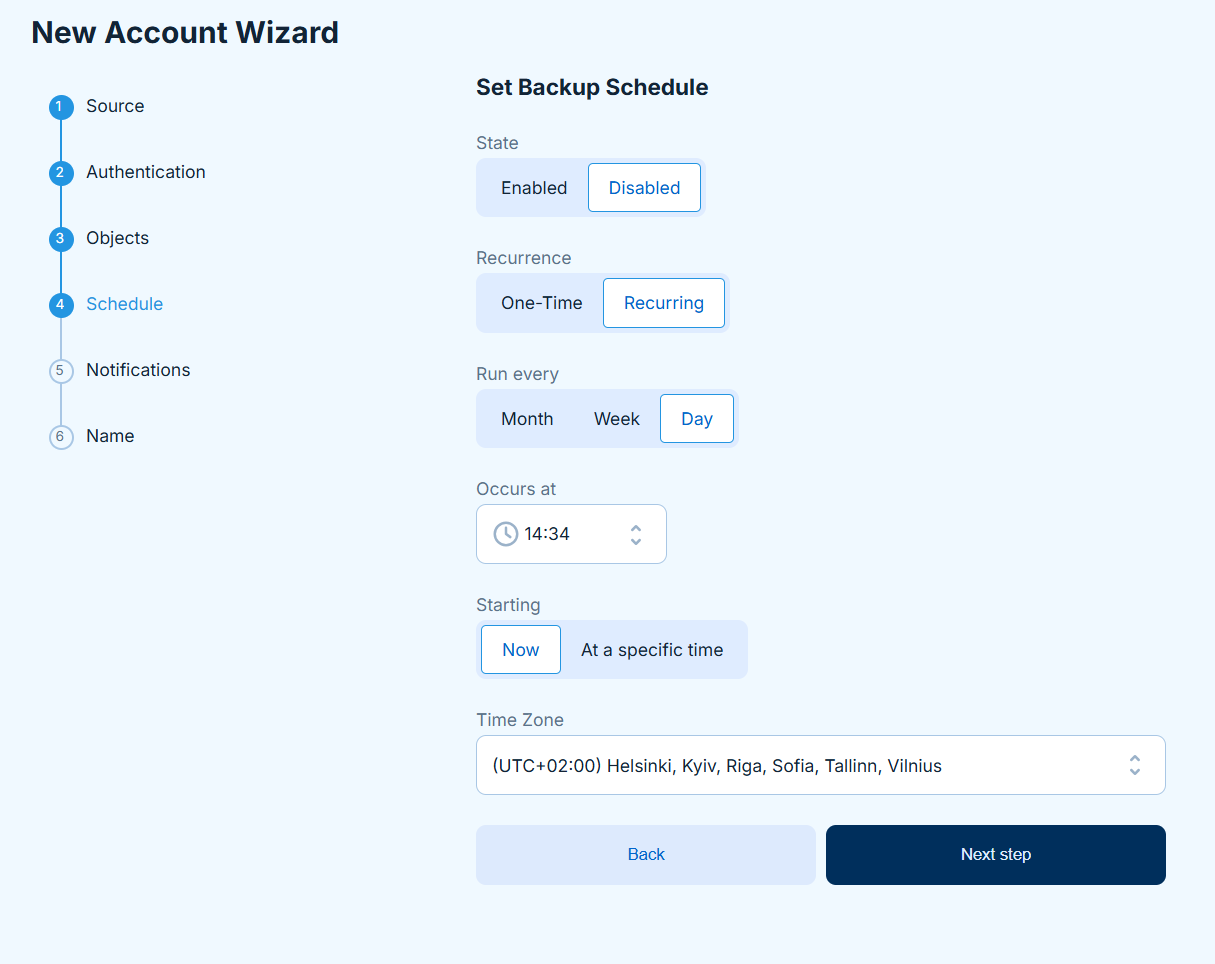
Optionally, enable and configure the backup schedule.
-
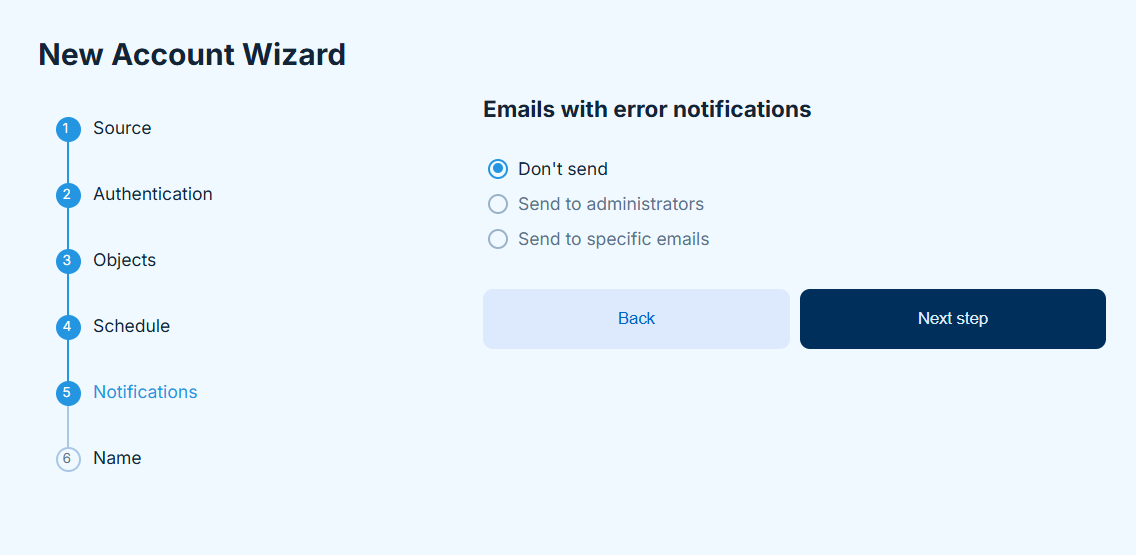
Choose whether to receive email notifications in case of scheduled backup failure.
-
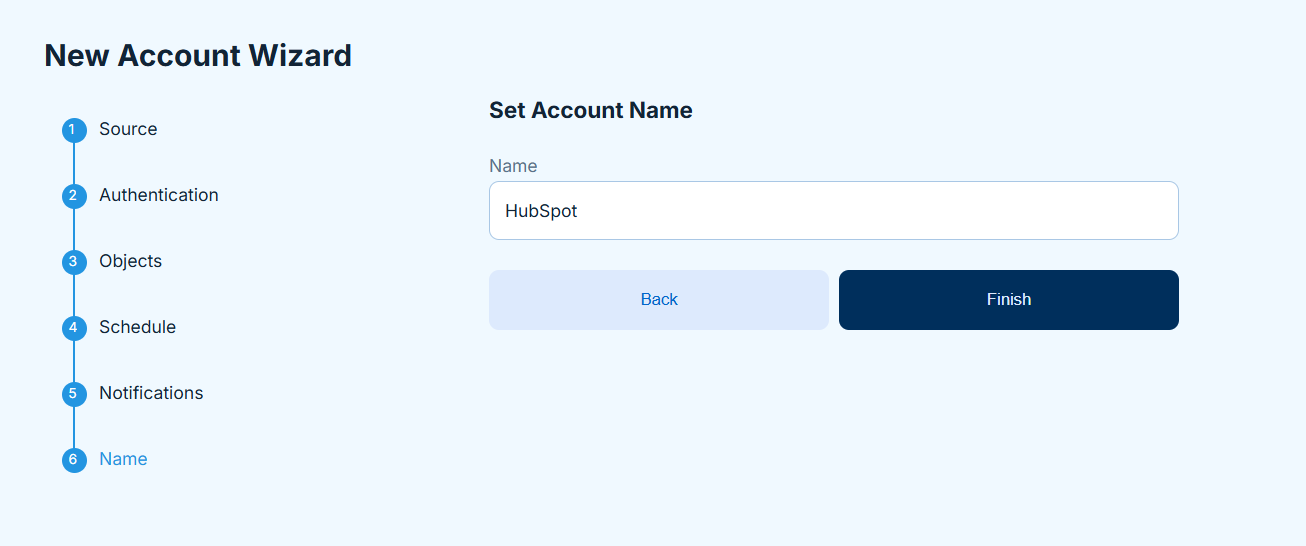
Name your account.
Once you have created your account, connected to the data source and defined the objects and fields for the future backups, you can run your first backup.
Running Your First Backup
To run your backup for the first time, make sure you are on the Backups page and click Back up now on the top right. Once the backup is complete, it will be displayed in the backups list.
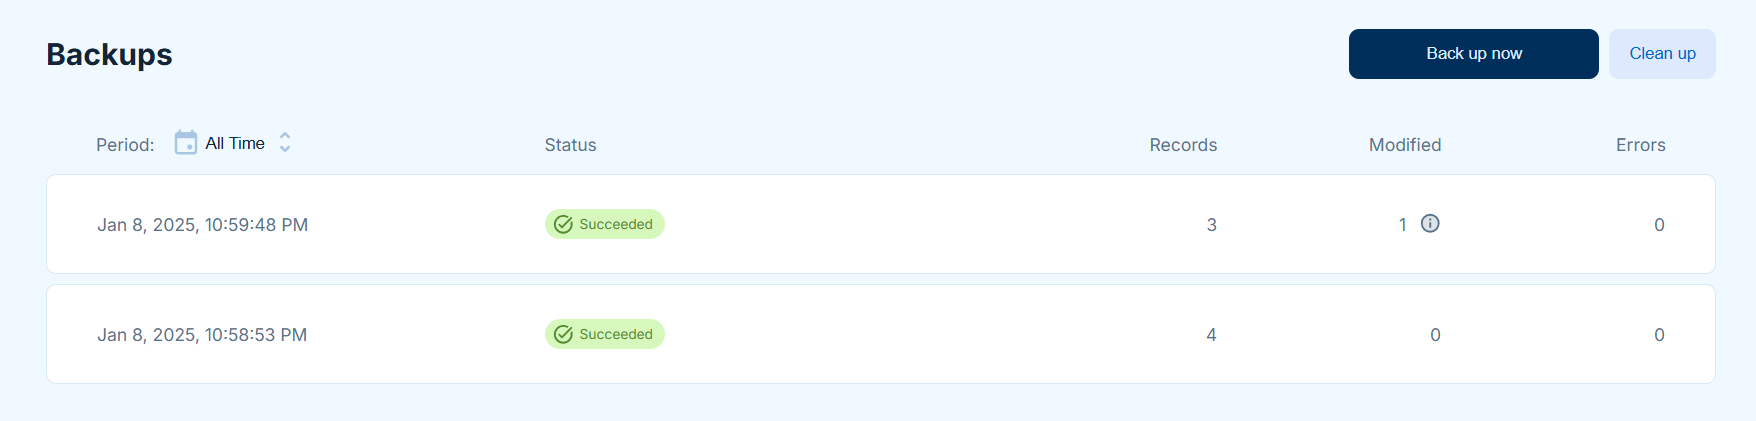
Click on your backup to view the backed-up objects. Click on the objects to view their records. Click CSV to download object as CSV file.

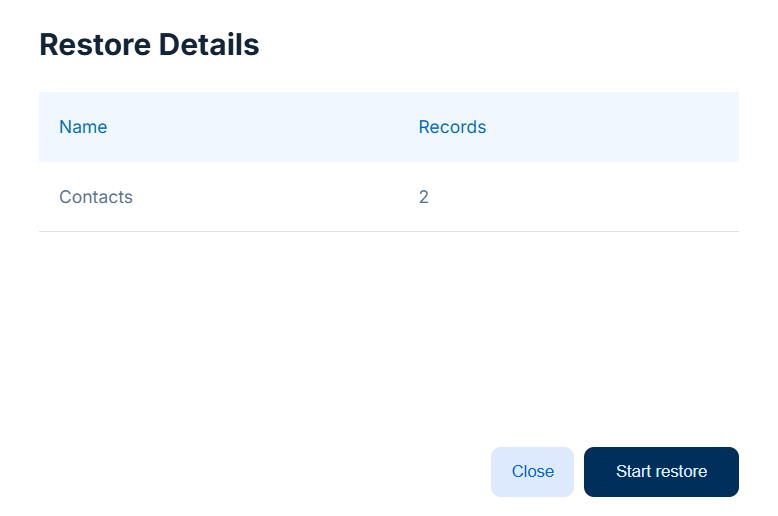
Restoring Data from a Backup
With SkyBackup you can restore objects and records, and compare your backups to restore changes only.
To restore data from a backup:
- Click on your backup.
- Select objects to restore.
- Optionally select specific records.
-
Select the way to restore your data by choosing one of the available DML operations.
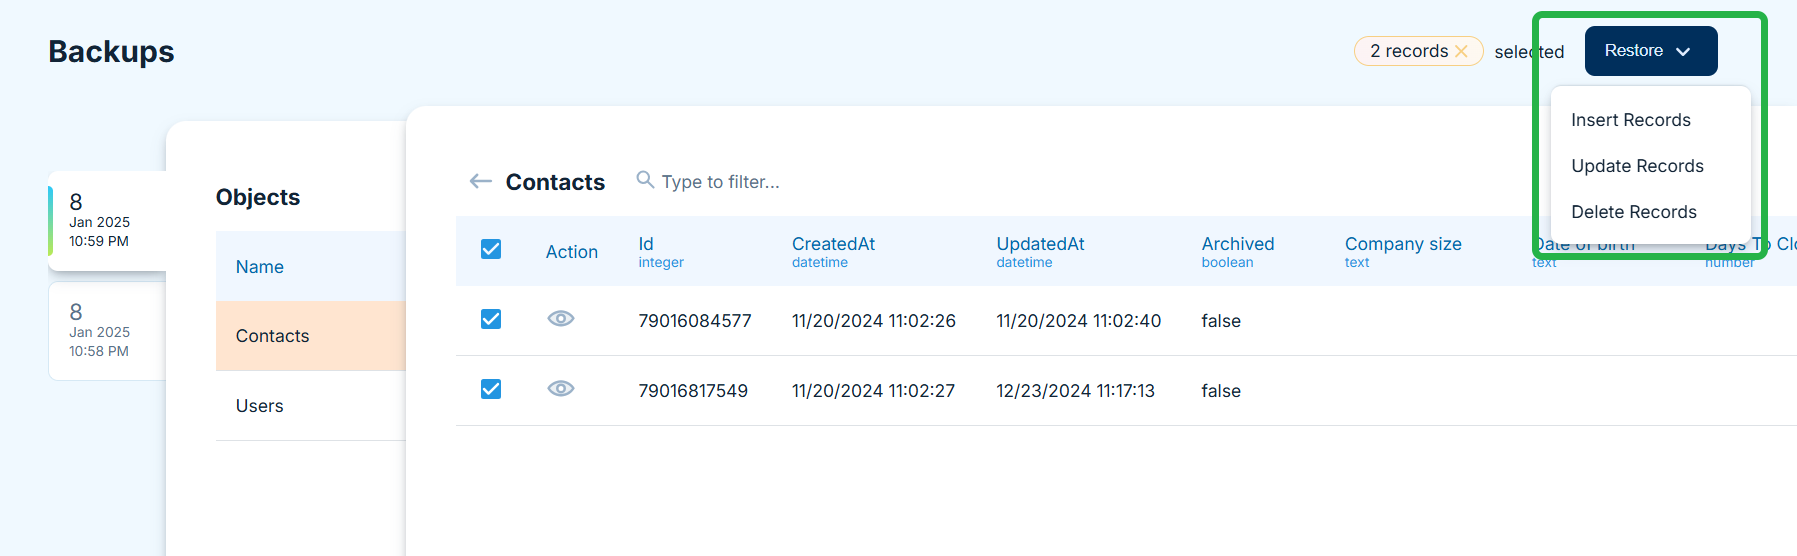
-
Click Start restore.